
Master the product design process steps to ship your MVP faster. Our founder's guide covers everything from discovery to handoff for startups.
Jan 11, 2026

So, you've got an idea. How do you turn that spark into a real, tangible product that people not only use but love? It all comes down to the process.
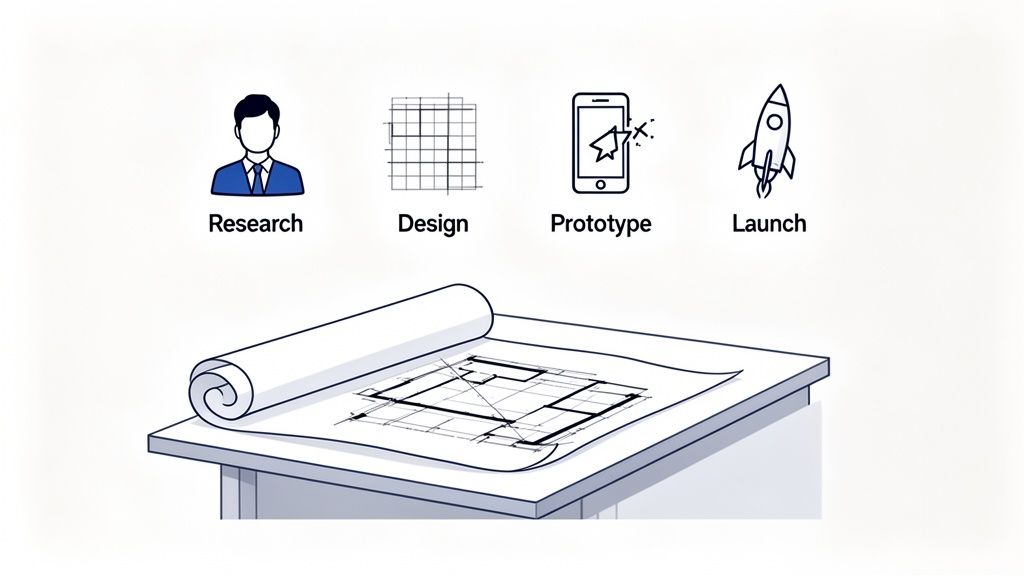
The journey from concept to code generally follows seven key phases: discovery, research, ideation, prototyping, testing, iteration, and finally, the developer handoff. Think of this as your roadmap—a structured way to make sure you're building something people will actually pay for.
Your Blueprint for Shipping Products That Convert
Let's be honest, building a product can feel chaotic, especially in the fast-paced world of startups. A solid design process isn't about adding bureaucratic red tape; it’s about creating a flexible framework that brings order to that chaos. It’s what keeps every decision anchored to real user needs and clear business goals.
Without this structure, you risk burning through your runway building features nobody asked for, leading to endless rework. A good system is what helps you move from a vague idea to a high-quality Minimum Viable Product (MVP) without all the guesswork.
Aligning Teams and Defining Success
One of the biggest wins from a structured process is simply getting everyone on the same page. When designers, developers, and founders all speak the same language and understand the playbook, communication just clicks. Everyone knows their role and what’s coming next, which cuts down on friction and keeps the momentum going.
Mastering this blueprint starts with understanding the New Product Development Process, which maps out the critical stages from idea to launch. This guide will walk you through that map, step-by-step.
Here’s what you'll be able to do by the end:
Nail Your Positioning: Figure out exactly where your product fits in the market and who it’s for—before a single line of code gets written.
Create Clear Workflows: Put practical phases in place that eliminate ambiguity and keep your team focused on what truly matters.
Focus on Real Outcomes: Shift from just shipping features to building products that deliver measurable results, like better conversion and retention.
A great design process doesn't guarantee a successful product, but a poor process almost guarantees failure. It’s the foundational system that enables great ideas to become great realities.
Ultimately, this framework is about building a sustainable business, not just a cool app. To explore the bigger picture of bringing a new venture to market, you might also want to check out our guide on https://shalev.agency/blog/product-development-for-startups.
Where Great Products Begin: Discovery and Research
Jumping straight into design without knowing your audience is one of the most expensive mistakes a startup can make. The discovery and research phase isn't just a box to check; it’s the bedrock of your entire product. This is your chance to challenge your own assumptions and confirm you’re solving a real, painful problem for a specific group of people.
Without this upfront work, teams often end up building something packed with features that nobody actually wants. I've seen it happen. Think of it like crafting a beautiful, intricate key without knowing what lock it’s supposed to open. You might end up with something technically impressive, but it’s ultimately useless if it doesn't solve a genuine need.
Uncovering User Needs And Market Gaps
The goal here is simple: move from "I think people want this" to "I know they need this." This means digging into two things at once: understanding your potential users on a deep, personal level and sizing up the competition to find your unique spot in the market. Get both right, and you've got a product that's not only wanted but also has a real chance to succeed.
For a lean startup, research doesn't have to mean a massive budget or months of work. It’s all about being smart and asking the right questions. Some of the most powerful methods are surprisingly simple:
Targeted User Interviews: Don’t just ask, "Would you use an app that does X?" That's a leading question. Instead, ask about their current reality. "Walk me through how you handle this now." "What’s the most frustrating part of that process?" You'll get gold.
Competitor Analysis: Look at both direct and indirect competitors. Scour their customer reviews—especially the bad ones. What are people consistently complaining about? That’s your opening.
Surveys and Questionnaires: Once you spot a pattern in your interviews, use simple surveys to see how widespread that feeling is. This is great for validating your qualitative hunches with some hard numbers.
Here's a hard truth I've learned over the years: solid user research can boost a product's success rate by over 40%. On the flip side, a shocking 35% of startup failures come down to poor market fit—which is almost always a direct result of skipping or rushing this phase.
To get the full picture, consider integrating with product analytics tools to see how people actually behave. This data is the perfect partner to what you hear in interviews, giving you both the "what" and the "why."
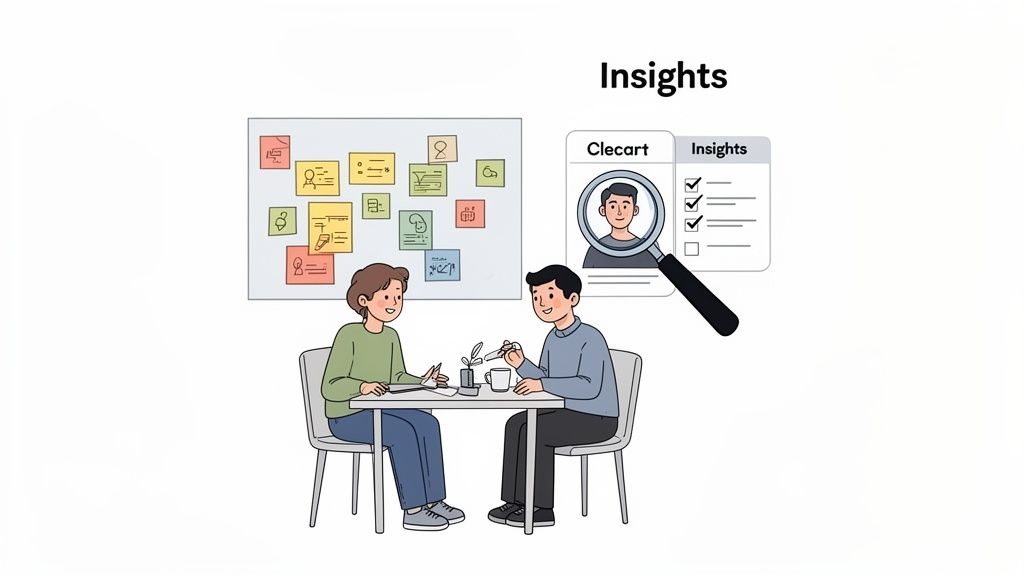
Turning Research Into Actionable Tools
All that research is just a pile of notes until you turn it into something your team can actually use. You need to synthesize your findings into clear, actionable documents that will guide every decision you make from here on out. These artifacts transform messy data into a clear direction.
The two most critical deliverables to come out of this phase are user personas and problem statements.
A user persona isn't just a demographic profile; it's a fictional character you build from the real data you gathered in your interviews. This persona has goals, motivations, and frustrations, making your target user feel like a real person in the room.
Having a visual summary like this is incredibly powerful. It keeps the entire team focused on solving problems for a specific human being, not just building cool features.
Next, you need to nail down your problem statement. This is a short, sharp description of the core problem you’re solving for your persona. A great problem statement is always framed from the user's point of view and never hints at a solution.
So, instead of saying, "We need to build a shared calendar feature," you’d frame it as, "Busy professionals struggle to coordinate team availability without getting stuck in endless email chains."
Getting this clarity is non-negotiable. It anchors every future design and development decision in a real user need, protecting you from scope creep and ensuring you’re building something people will genuinely value. This foundational work will save you countless hours of rework down the line, setting you on a path to create a product that truly resonates.
Phase 3: Turning Insights into Ideas
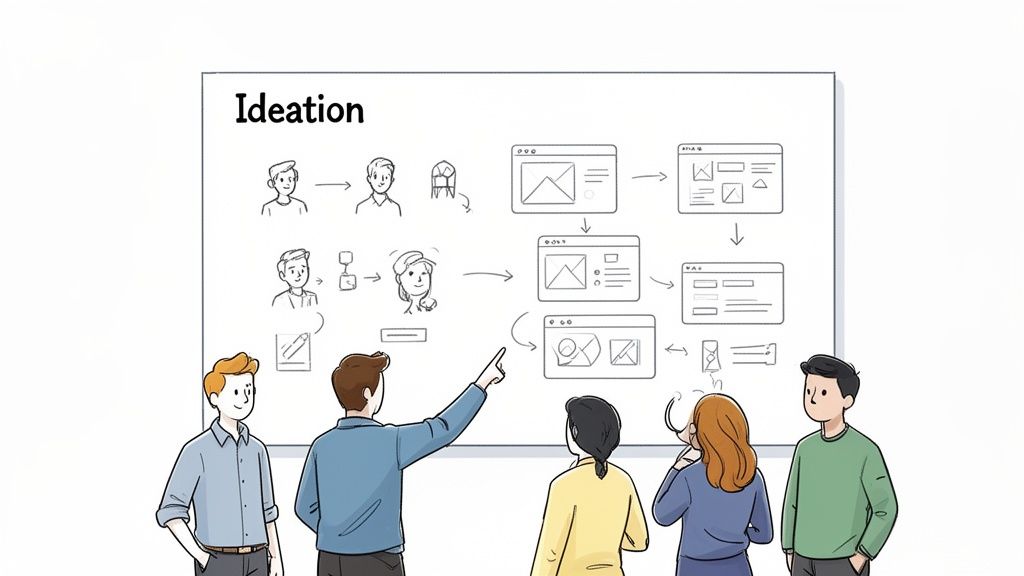
Alright, you’ve done the hard work of research and you're armed with a deep understanding of your user's world. Now for the fun part: turning all those insights into actual, tangible solutions. This is the ideation phase, where creativity and structure meet.
The initial goal here isn't to find the one perfect idea. It's about generating as many ideas as possible. Think quantity over quality. We want to explore every weird, wonderful, and wild possibility before we start narrowing things down. Create a judgment-free zone where every idea is welcome.
How to Generate Ideas as a Team
Ideation is a team sport. When you get designers, developers, product managers, and even marketers in the same room (or on the same call), you get a 360-degree view of the problem. A developer might point out a technical shortcut a designer didn't consider, while a product manager ensures the ideas stay tethered to the business goals.
We’ve found the most effective techniques are fast, visual, and collaborative.
Crazy 8s: This is a classic for a reason. Each person grabs a sheet of paper, folds it into eight sections, and has just eight minutes to sketch eight different ideas. It's a fantastic way to push past the first, most obvious solution and get to the truly creative stuff.
Storyboarding: Don't just think about a feature, think about the story. A storyboard visually maps out the user’s entire journey from start to finish. It forces the team to think through the flow step-by-step, which is great for spotting potential roadblocks early on.
Mind Mapping: Start with your core user problem in the center of a board. From there, your team can branch out with related concepts, features, and solutions. This is a brilliant way to see how different ideas connect.
The best solutions almost never come from a single "eureka!" moment. They're forged in the messy, collaborative process of sifting through dozens of ideas—the good, the bad, and the bizarre—and then combining and refining them.
Tools like Miro or FigJam are indispensable here, especially for remote teams. They act as a shared digital whiteboard where everyone can contribute in real-time, keeping the energy high and the ideas flowing.
Mapping the User’s Path
Once you have a cluster of promising concepts, it's time to add some structure. We're moving from "what if" to "how would this actually work?" This begins with user flows.
User flows are simple diagrams that map out the exact path someone takes to get something done in your product. Imagine you're building a food delivery app and your research flagged a clunky checkout process as a major pain point. A user flow would map every screen and every click from "add to cart" to "order confirmed." This blueprint quickly reveals confusing dead ends or missing steps before a single screen is designed.
Building the Blueprint: Wireframes
With a clear user journey mapped out, the next step is to create wireframes. Think of these as the architectural blueprints for your app or website. They are intentionally simple, low-fidelity layouts—often just black, white, and gray boxes—that focus entirely on structure and functionality.
Wireframing forces you to make crucial decisions about layout and information hierarchy without getting distracted by colors, fonts, and images. This is an absolutely vital part of UX design for startups because it makes iteration cheap and fast. You can mock up a screen, get immediate feedback, and rearrange elements in minutes. Getting the bones right at this stage will save you countless hours of painful redesigns later on.
Making Your Ideas Tangible: Prototyping and Testing
Your wireframes have given your idea a skeleton. Now it's time to put some skin on those bones and see if it can actually walk. This is the prototyping and testing phase—the first moment your abstract concept starts to feel like a real, living product that people can touch and interact with.
This isn't about building the final, polished app just yet. Think of it as creating a simulation, a functional model designed to answer one critical question: does this thing actually solve the problem for our users in a way that makes sense to them? It’s your most important reality check before a single line of production code gets written.
Choosing the Right Level of Detail
Prototypes come in all shapes and sizes, from quick-and-dirty paper sketches to interactive mockups that feel indistinguishable from a finished product. The trick is to pick the right level of detail—or fidelity—for what you need to learn right now, without wasting time on bells and whistles that don't matter yet.
You'll generally work with two types:
Low-Fidelity (Lo-fi) Prototypes: These are basically interactive wireframes. We're talking grayscale, basic shapes, and a laser focus on pure functionality and flow. Tools like Balsamiq or even just stringing screens together with simple links in Figma are perfect here. Go with lo-fi when you need to test the core user journey and make sure the structure holds up, long before anyone gets distracted by visuals.
High-Fidelity (Hi-fi) Prototypes: These look and feel like the real deal. They’ve got the branding, colors, typography, and slick animations all baked in. Hi-fi is what you use when you need to test the usability of specific UI elements, get feedback on the visual design, or get final buy-in from stakeholders who need to see a polished concept.
I’ve seen so many teams make the mistake of jumping straight into a beautiful, hi-fi prototype. The result? Users get fixated on the shade of a button instead of telling you that the entire checkout flow is a confusing mess. Always get the bones right with lo-fi first.
This is what a high-fidelity prototype looks like in action. You can see how specific elements are linked to simulate how a user would navigate the app, which is absolutely essential for catching those frustrating dead-ends and confusing paths before they get built.
Running User Tests That Uncover Real Insights
Got a prototype? Great. Now it's time to put it in front of actual human beings. The goal of user testing isn't to fish for compliments or ask people if they like your design. Your real job is to watch them use it and see where they get stuck, confused, or frustrated. That raw, unfiltered feedback is pure gold.
A great user testing session feels more like observation than an interview. Your goal is to get the user comfortable enough to think out loud while they try to complete tasks in your prototype.
Here’s how to run tests that actually work:
Have a clear goal. Know exactly what you're trying to learn. Are you testing the onboarding flow? The checkout process? Focus each session on a specific task.
Recruit the right people. Test with users who actually fit your target persona. Getting feedback from the wrong audience will send you down a rabbit hole of bad data.
Use open-ended prompts. Don't ask leading questions like, "That was easy, right?" Instead, say, "Show me how you'd find your account settings." Let them do the work.
Embrace the awkward silence. This is the hardest but most important part. When a user hesitates or gets stuck, resist every urge to jump in and help. Let them struggle for a moment. That friction is where your most valuable insights are hiding.
From Feedback to Actionable Iteration
All that feedback you just gathered is worthless if you don't do anything with it. After a handful of tests, you'll start seeing patterns emerge. Maybe three out of five people couldn't find the "save" button, or everyone got tripped up on the same step during sign-up.
This is where you synthesize what you've learned and use it to improve the prototype. This creates a simple but incredibly powerful feedback loop: build, test, learn, and repeat. Each cycle brings you one step closer to a design that feels intuitive and genuinely solves the user's problem.
This whole process has been turbocharged by modern tools. The shift to digital tools post-1990s, including VR/AR for early testing, has slashed iteration cycles from months down to days. For a startup trying to get an MVP out the door, that speed is everything. Industry reports consistently show that teams using modern CAD and design tools can achieve a 50-60% faster time-to-market. You can learn more about how modern tooling impacts the product design process.
This iterative loop is your secret weapon for de-risking a product launch. By validating every major design decision with real user behavior, you dramatically increase the chances that the thing you build is something people will actually want and use.
From Polish to Production: Iteration and Handoff
So you’ve gone through rounds of prototyping and user testing, and now you’re staring at a mountain of feedback. Welcome to the final leg of the journey. This is where you transform a promising prototype into a polished, production-ready blueprint that your engineering team can actually build.
It's a delicate dance of refinement, documentation, and crystal-clear communication.
The first hurdle is sifting through all that feedback. Not every suggestion is a gem, and if you treat every piece of input with the same weight, you'll be stuck in a loop of tweaks that delays your launch indefinitely. Your job is to be ruthless in your prioritization, zeroing in on what's absolutely essential for your MVP.
Sifting Through Feedback for Your MVP
A simple way to do this is to split all the feedback into two buckets: must-haves and nice-to-haves.
A "must-have" is a fix for a critical usability issue—something that stops a user from completing a core task. A "nice-to-have," on the other hand, is a feature suggestion or a minor cosmetic tweak that can easily wait for a future update.
To tell them apart, just ask one question for each piece of feedback: "If we don't fix this, will the product fail to solve the user's core problem?" If the answer is yes, it's a must-have. Everything else gets logged in a backlog for version 1.1 and beyond.
I've seen too many teams chase perfection right out of the gate. Remember, the goal of an MVP isn't to ship every feature imaginable. It's to ship the right features that deliver immediate value and let you start learning from real-world use.
The process that gets you to this point is a simple but powerful loop of building, testing, and iterating.
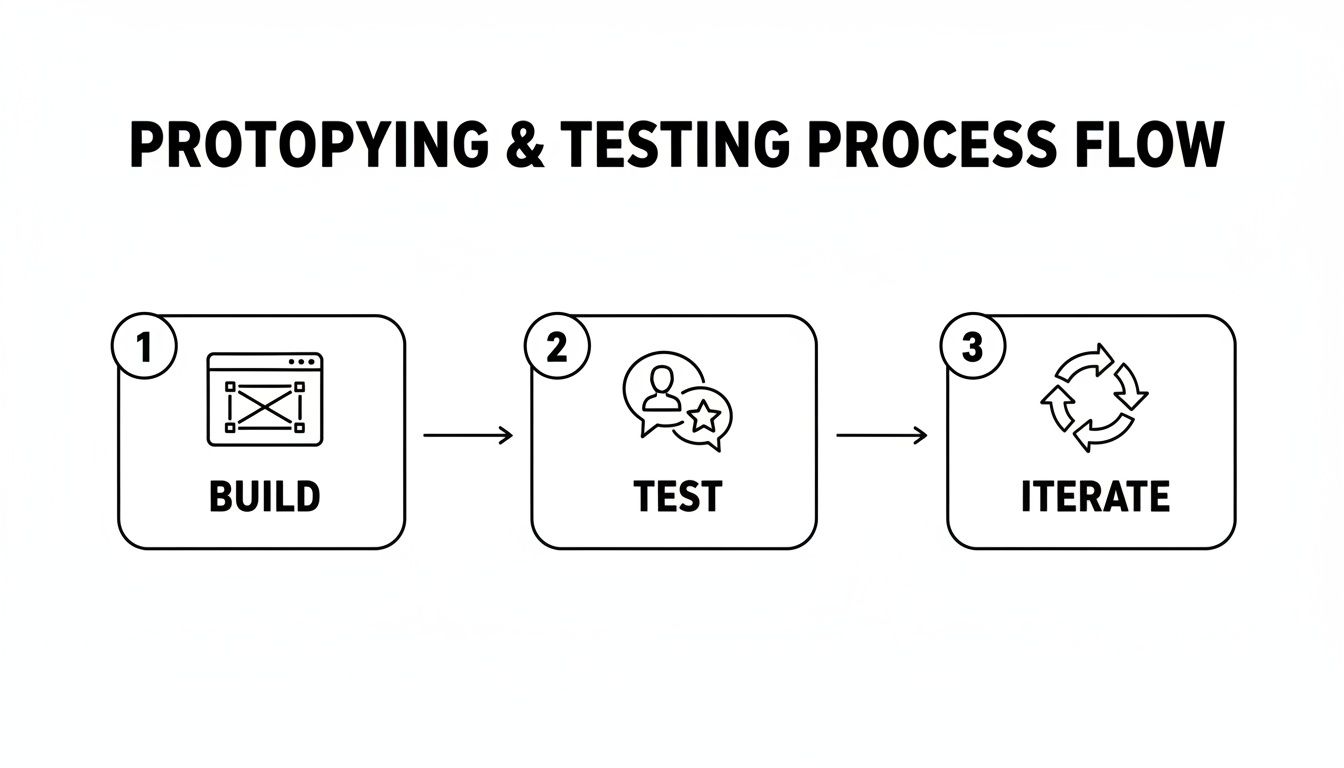
This build-test-iterate cycle is the engine that drives your product forward, making sure each revision strengthens the design before it ever gets to a developer.
Creating a Lightweight Style Guide
As you put the finishing touches on the design, it’s the perfect time to create a simple style guide or a basic design system. I’m not talking about building a massive, complex component library from scratch. It’s about documenting the fundamentals to keep things consistent as your product grows and more people touch the code.
For an early-stage product, your guide just needs the basics:
Color Palette: Define your primary, secondary, and accent colors, along with their HEX codes.
Typography: Specify the font families, sizes, and weights for headings (H1, H2, H3) and body text.
Key UI Components: Document the look and feel for core elements like buttons, input fields, and dropdowns.
This document becomes the single source of truth for your developers. It prevents inconsistencies and saves everyone from making small, subjective design decisions on the fly.
The Developer Handoff Checklist
A smooth handoff is all about clarity and proactive communication. Just tossing a Figma link over the fence and hoping for the best is a recipe for disaster. A well-prepared handoff package should anticipate questions and remove any ambiguity before it can cause problems. Understanding the full scope is vital, and you can see how this fits into the bigger picture by exploring different website development processes.
Here’s a practical checklist I use to make sure nothing gets lost in translation:
Clean Up Your Design Files: Name your layers logically. Group related elements. Get rid of unused screens and components. A tidy file isn't just nice to look at; it shows you respect the developer's time.
Add Detailed Annotations: Don't make your engineers guess. Leave notes directly in your design files to specify spacing, user flows, and interaction states (like hover, active, and disabled).
Export All Assets Clearly: Provide all icons, images, and illustrations in the right formats (SVG for icons is usually best) and resolutions. Name them systematically so they are easy to find and implement.
Schedule a Handoff Meeting: This is non-negotiable. Walk the engineering team through the final prototype. Explain the user flows and the "why" behind your key design decisions. This meeting is the perfect chance to answer questions and align on expectations before a single line of code is written.
When you treat the handoff as a crucial step in the design process itself, you build a much stronger bridge between design and engineering. The result? A faster, more accurate build and, ultimately, a much better product.
Spotting (and Dodging) Common Product Design Traps
Even with a great process, things can go sideways. I've seen it happen time and again. It's rarely a bad idea that sinks a project, but a series of small, predictable missteps that add up. Knowing what these traps look like is half the battle.
Working in a Vacuum
The most classic blunder? Designing in a silo. A designer disappears for weeks, pouring their heart into a pixel-perfect mockup. They emerge, triumphant, only to hear from engineering that half of it can't be built, or from the product manager that it misses a key business goal. It’s a painful, expensive waste of time.
The antidote is simple: constant, informal check-ins. Forget big, stuffy meetings. I’m talking about quick 15-minute huddles with your lead developer and product owner each week. Just walk them through what you're thinking. This simple habit keeps everyone aligned and ensures what you're designing is both feasible and valuable.
Falling in Love With Your First Idea
Here’s another one I see all the time: getting way too attached to the first decent concept that pops up. When a team locks onto one solution too early, they stop exploring. They close the door on what might be a much, much better answer to the user's problem. This kind of "solution attachment" is the enemy of innovation.
The trick is to force yourselves to generate lots of ideas, fast. Time-box your ideation sessions using something like the Crazy 8s method. The whole point is to push past the obvious.
Start a clock: Give everyone a strict limit, say 25 minutes, to sketch out as many solutions as they can. No judging.
Go for weird: Emphasize that this is about quantity, not quality. This gives people permission to think outside the box.
Vote with dots: Have everyone quietly place dots on their favorite three concepts. This prevents the most senior or loudest person from swaying the group.
Marrying your first idea is a recipe for a mediocre product. The best solutions are rarely the first ones you think of; they are discovered through rigorous exploration and a willingness to discard what isn't working.
The Slow Death by "One More Thing"
And finally, let's talk about the silent killer of launch dates: scope creep. It always starts innocently with "could we just add this one small feature?" Before you know it, you've got a bloated MVP and your release date is a distant memory. This almost always happens when the team loses sight of the core problem they're trying to solve.
To fight this, you have to be relentless about protecting the MVP. Keep the primary problem statement front and center. Every time a new feature request comes up, ask the hard question: "Is this absolutely critical for solving the user's core problem in our first version?" If it's not a clear and immediate "yes," it goes to the backlog. That discipline is what separates the teams that ship from the teams that are always almost ready.
Got Questions? We've Got Answers
Even with the best roadmap, you're bound to hit a few questions along the way. Let's tackle some of the most common ones we hear from founders and product teams diving into this for the first time.
How Long Does This Whole Process Take for an MVP?
There's no single magic number, but for a focused startup, you're realistically looking at a four-to-eight-week sprint to get through the core design phases for an MVP. Think of it as a ballpark figure for your initial planning.
So, how does that break down? You might spend the first one to two weeks deep in discovery and research. Ideation and wireframing usually follow, taking another one to two weeks. The heaviest lift is almost always the prototyping and testing cycle—that can easily take two to four weeks of refining and iterating until it feels right.
The key to hitting that timeline? Keep your scope tight and be ruthless about prioritizing the feedback that matters most.
What Are the Must-Have Tools for a Lean Design Team?
You really don't need to break the bank on software. A small, scrappy team can do amazing work with just a handful of solid tools.
Design & Prototyping: Figma is king here. It's the industry standard for a reason, letting your team design, wireframe, and build interactive prototypes all in one place.
Research & Organization: You need a digital whiteboard to make sense of everything. Miro or Notion are perfect for mapping out user flows, synthesizing feedback, and keeping all your decisions in one central hub.
Communication: Don't underestimate the power of quick, daily chats. A tool like Slack keeps designers, developers, and founders on the same page without getting lost in email threads.
The trick isn't to have a dozen different apps. It's about picking a few that work well together and create a single source of truth for the entire team.
How Do We Balance What Users Want With Our Own Vision?
This is the million-dollar question, isn't it? It’s a tightrope walk every founder has to master.
Your vision is your "why"—the big, hairy problem you're passionate about solving. User feedback is the "how"—it shows you the clearest path to solving that problem for the people who will actually use your product. Your vision is the north star, but the trail you hike to get there can and should change based on the terrain.
When a bunch of users stumble on the same feature, it's not a sign your vision is wrong. It's a gift! It’s a bright, flashing sign showing you exactly how to make your product better.
Here’s a practical way to sort through the noise:
Usability Issues: These are the roadblocks. If people can't complete a core task, you fix it. Period.
New Feature Ideas: Great! But are they essential for solving the main problem right now? Log them in a "someday/maybe" list and revisit later.
Subjective Opinions: Someone doesn't like the color blue? That's personal preference. Weigh these comments against your core user persona and the data you've collected before you act.
At Shalev Agency, we live and breathe these challenges every single day, helping founders turn bold ideas into beautifully crafted products that people love. If you need a partner to help you find that clarity and get to market faster, we should talk.